Introduction
Let's see ServerlessQ in Action! This post will show you a common use-case that people are using in ServerlessQ ⏭️ Image Resizing.
This is the accompanying GitHub repository
Image Resizing
Digital applications rely heavily on images, but using large images can cause apps to slow down, leading to user frustration and abandonment. To avoid this, resizing images is essential for optimizing app performance and improving user experience.
If you are a web developer, I am certain you've encountered this task several times in your life already. Especially if you have a public-facing web application where SEO matters, it is important that your images have the optimal size.
Image Resizing is async
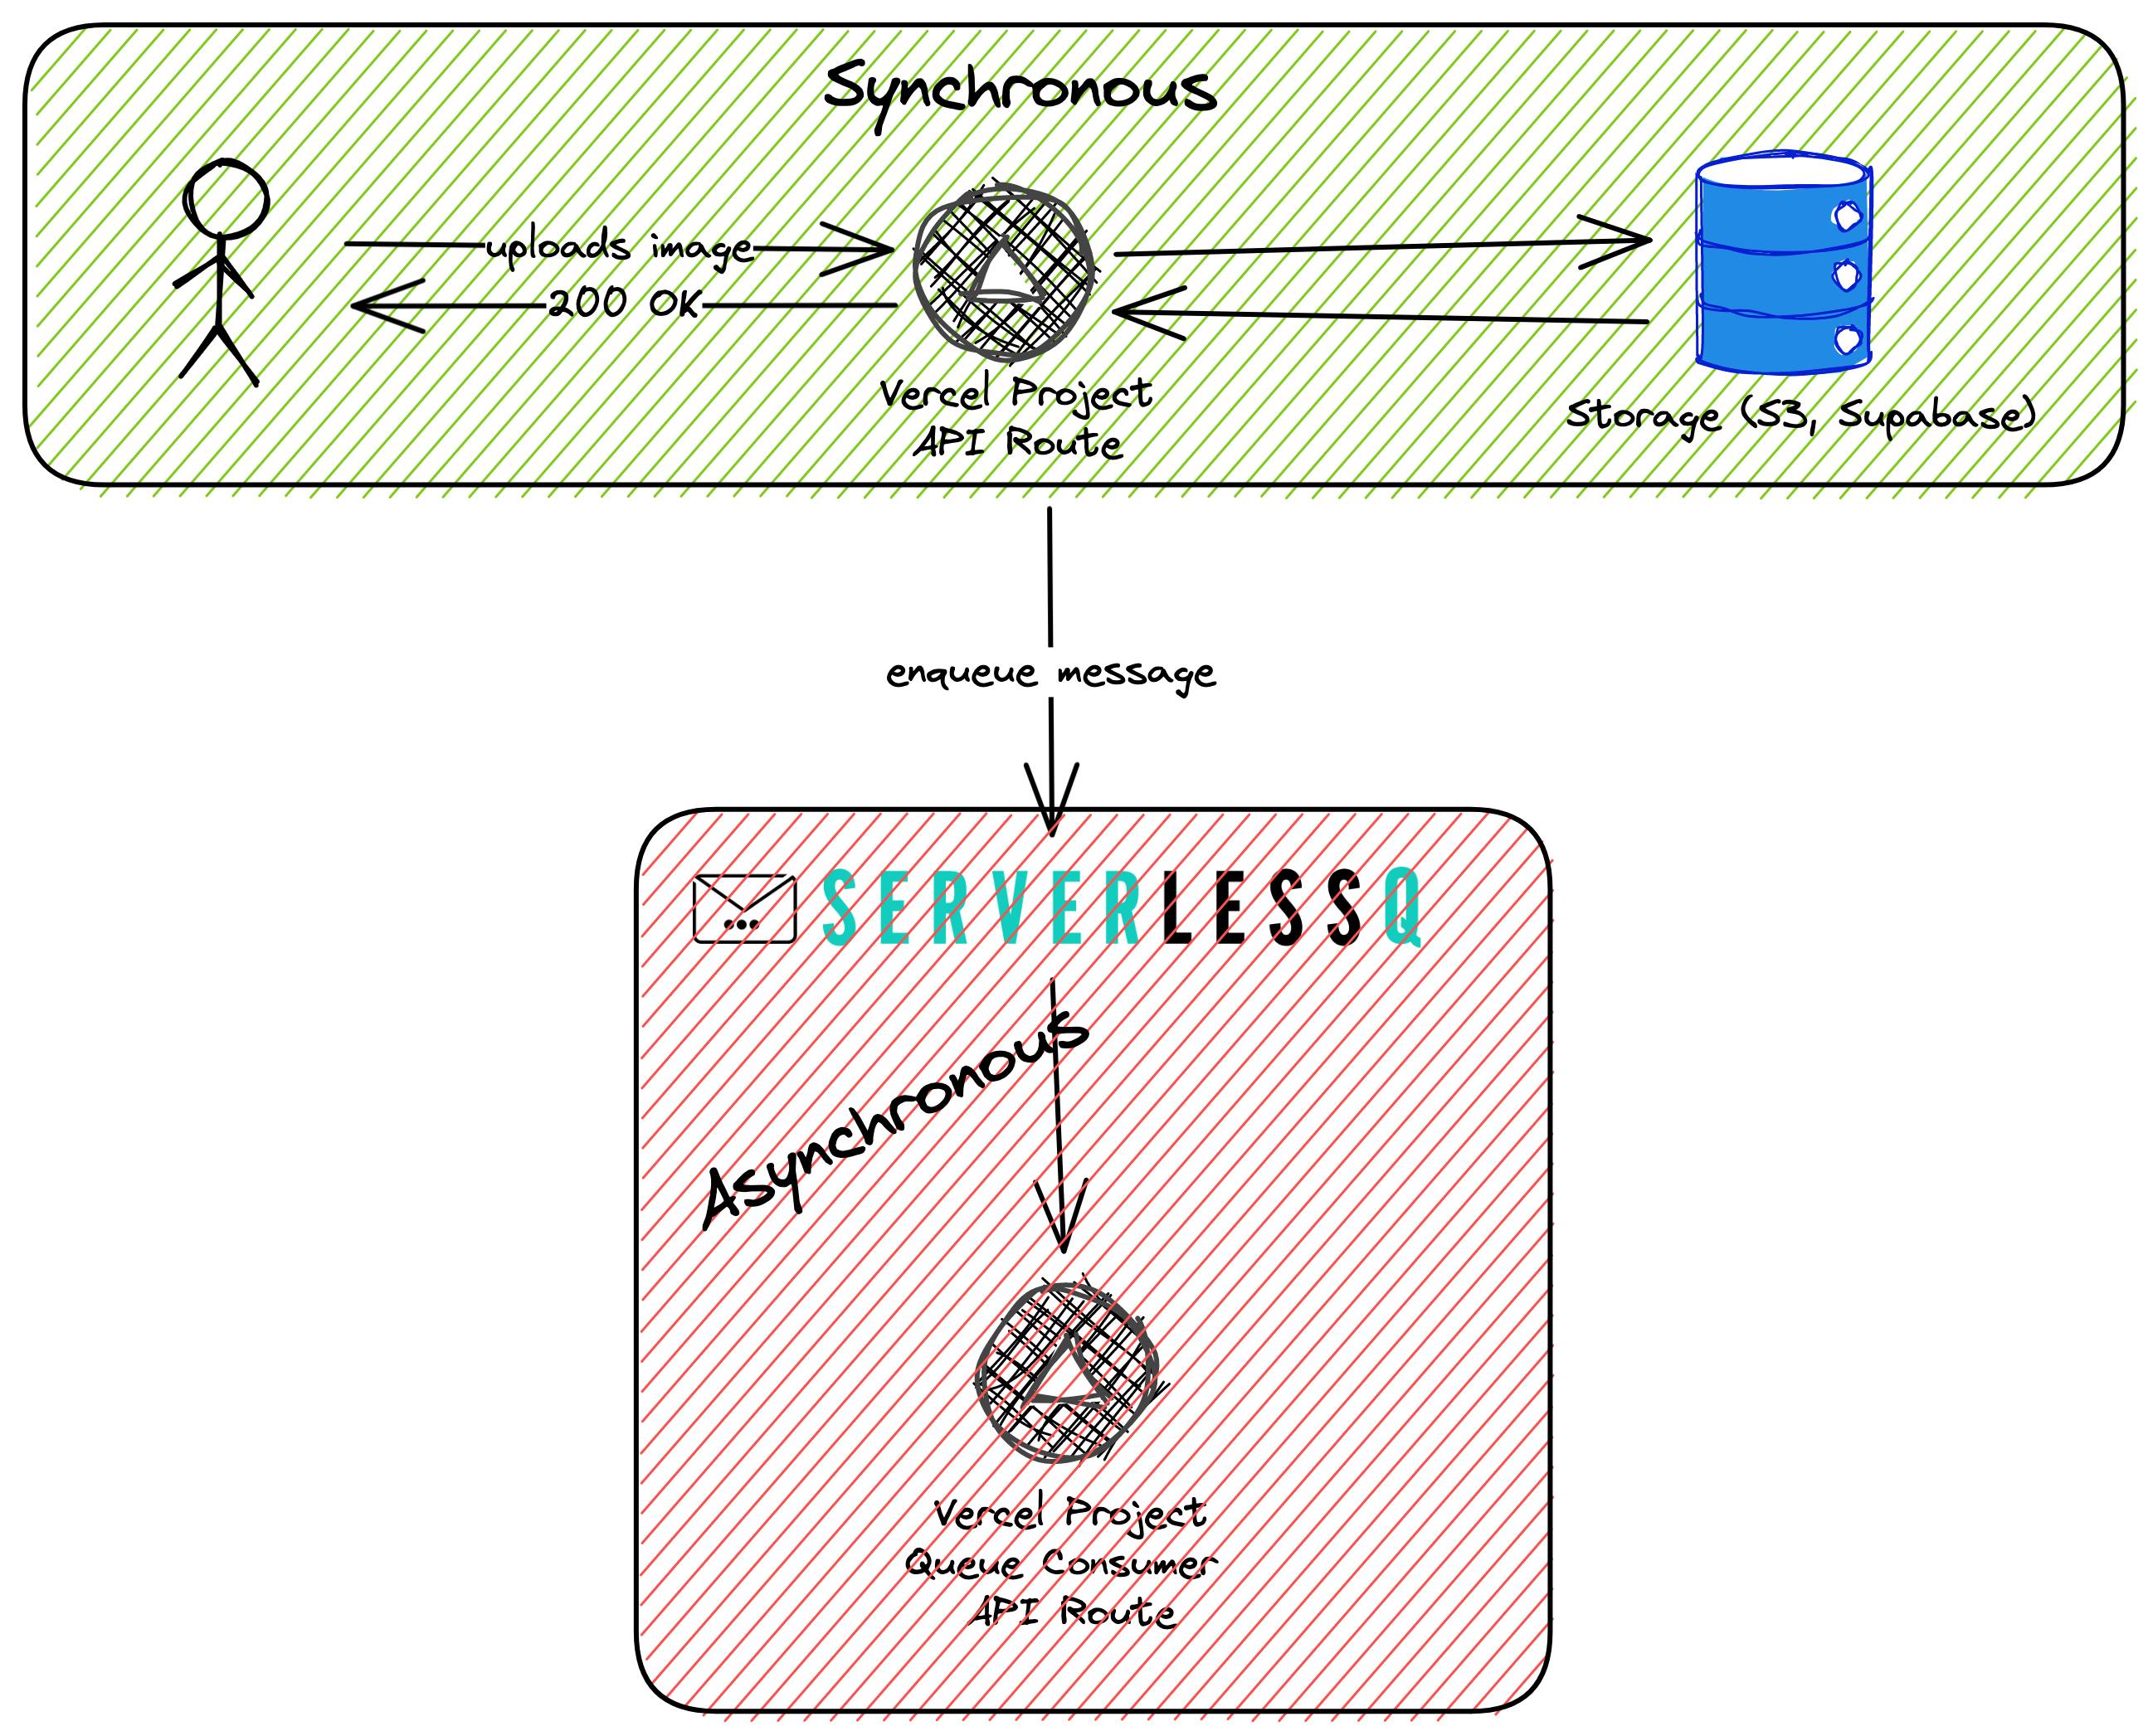
Resizing images is a typical task that can be executed asynchronously. The user who uploads the image doesn't need to wait until it is finished to continue with his/her work (e.g., after onboarding). The user should simply upload the image; our system should handle the rest.
Architecture
Let's have a quick look into all components that are involved:
Upload API - One synchronous API that handles the actual upload of their image
BLOB Storage - Some BLOB storage. For our example, this is Supabase Storage. You can also use AWS S3 or any other BLOB storage you like
ServerlessQ - ServerlessQ is used as the message queue
Queue Consumer - An API that can handle requests from ServerlessQ. This function resizes the actual images into different sizes.
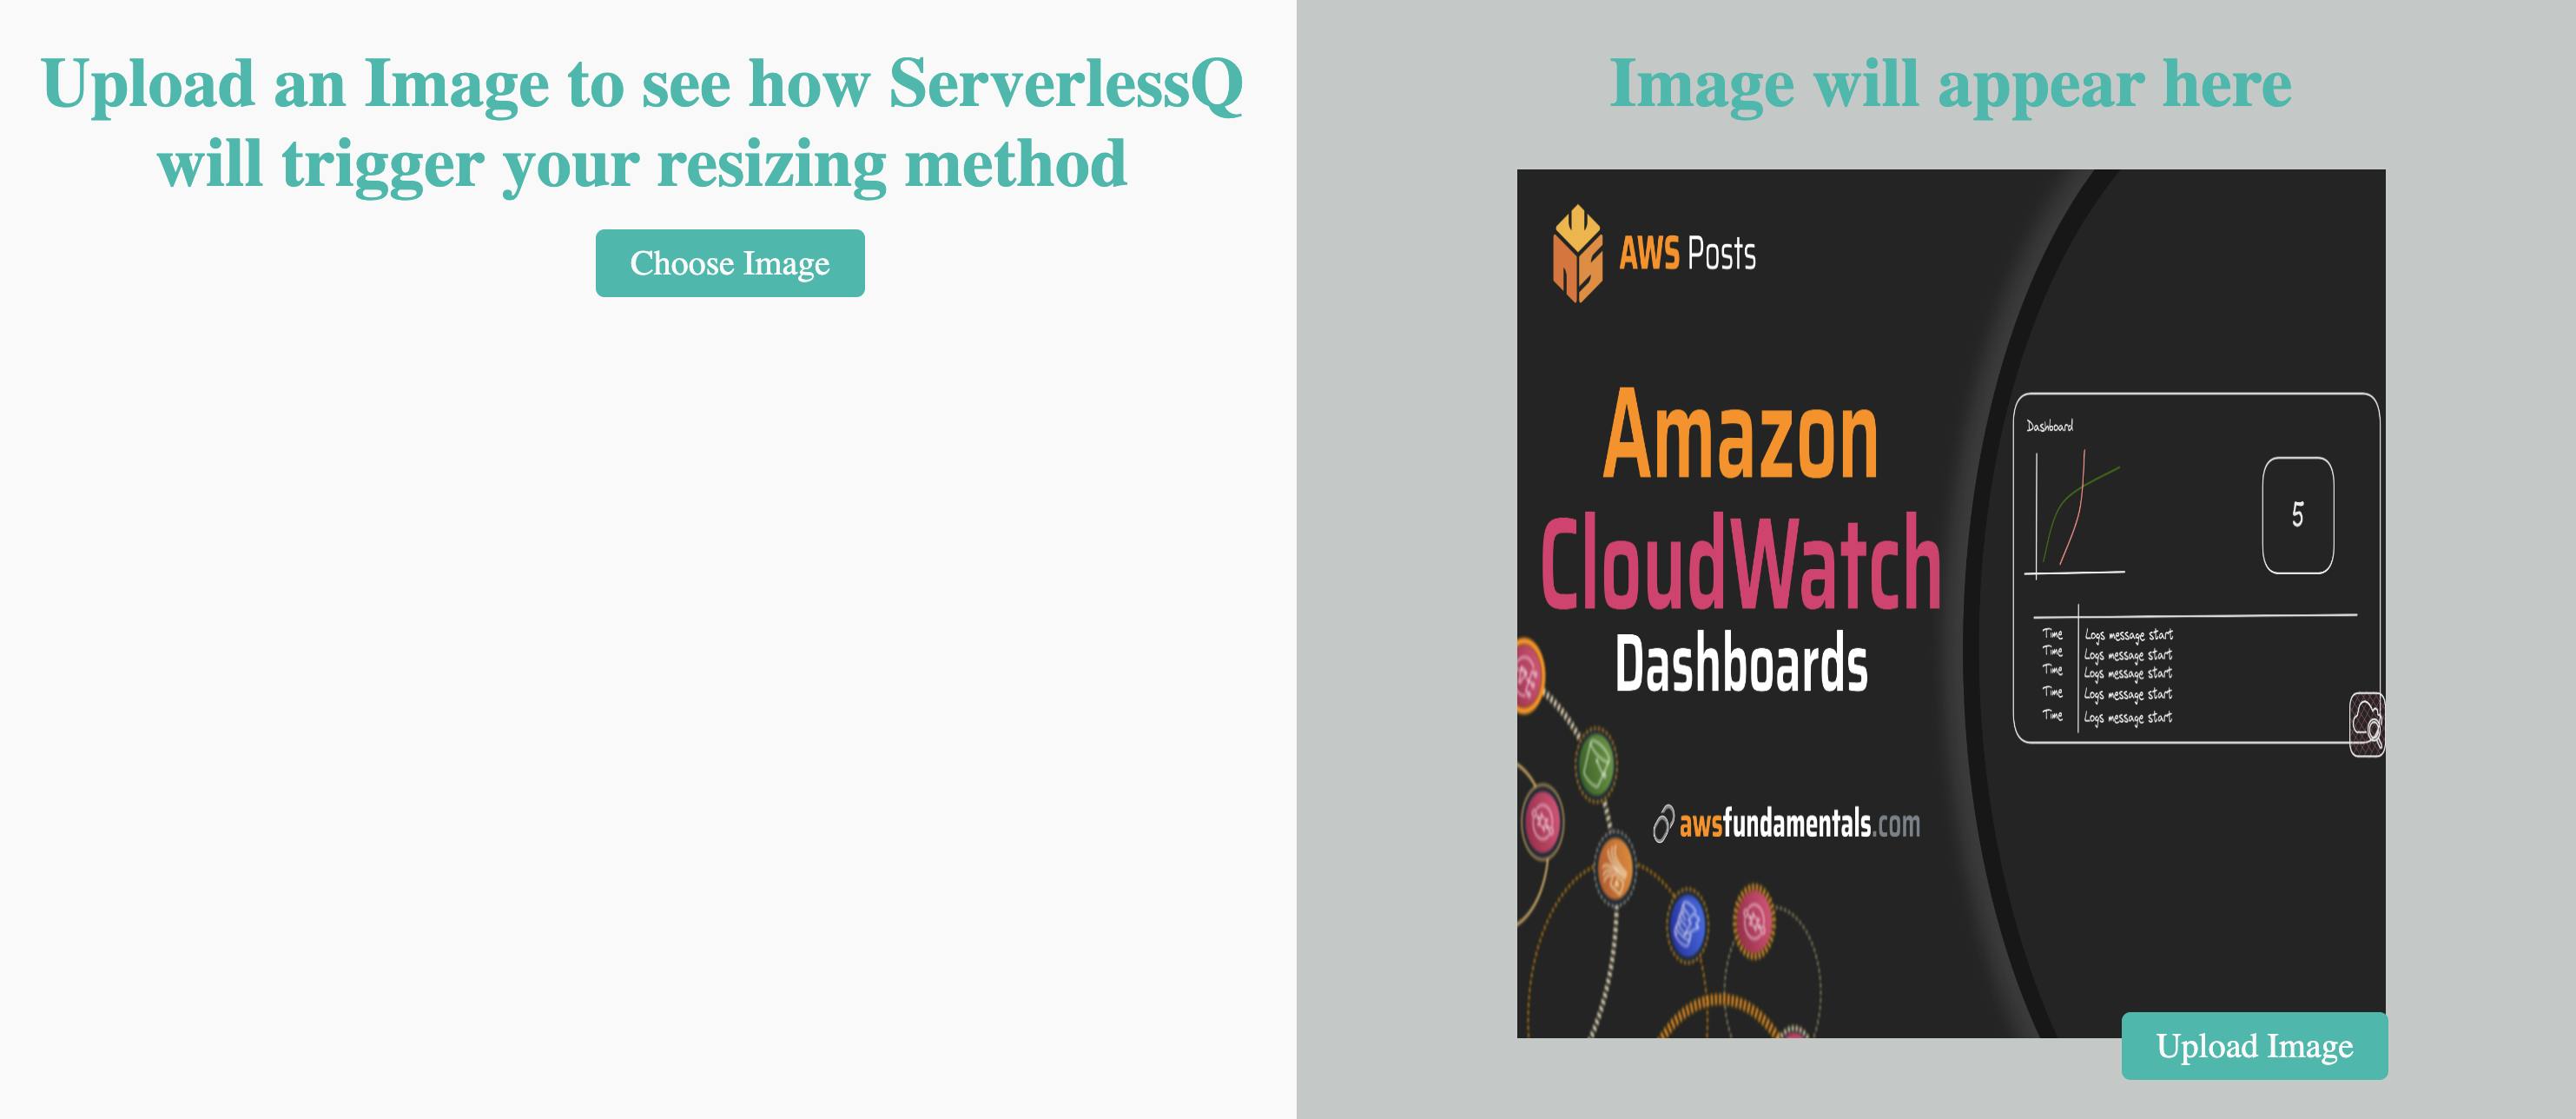
Application for uploading images
We've created a small example application for uploading images. We've used Supabase as a BLOB storage but feel free to use any other BLOB solution out there.
Go to the GitHub repository, check it out locally, or deploy it directly to Vercel with the deployment button. For Supabase you simply need to add the API key.
The file pages/api/upload.ts takes care of the uploading part:
// Create a single supabase client for interacting with your database
const supabase = createClient(
  process.env.SUPABASE_URL,
  process.env.SUPABASE_KEY
);

export default async function handler(
  req: NextApiRequest,
  res: NextApiResponse
) {
  const queue = await ResizeImageQueue;

  const { files } = await asyncParse(req);
  const file = files.image as formidable.File;
  const image = await readFile(file.filepath);

  // ... your business logic for image uploading

  const { data, error } = await supabase.storage
    .from(Bucket)
    .upload(`product/${file.originalFilename}`, image);

  if (error) {
    console.log(error);
    return res.status(500).json({ error });
  }

  // Enqueue the job
  await queue.enqueue({
    method: "POST",
    body: {
      Key: data.path,
      Bucket: Bucket,
    },
  });

  res.status(200).end();
}
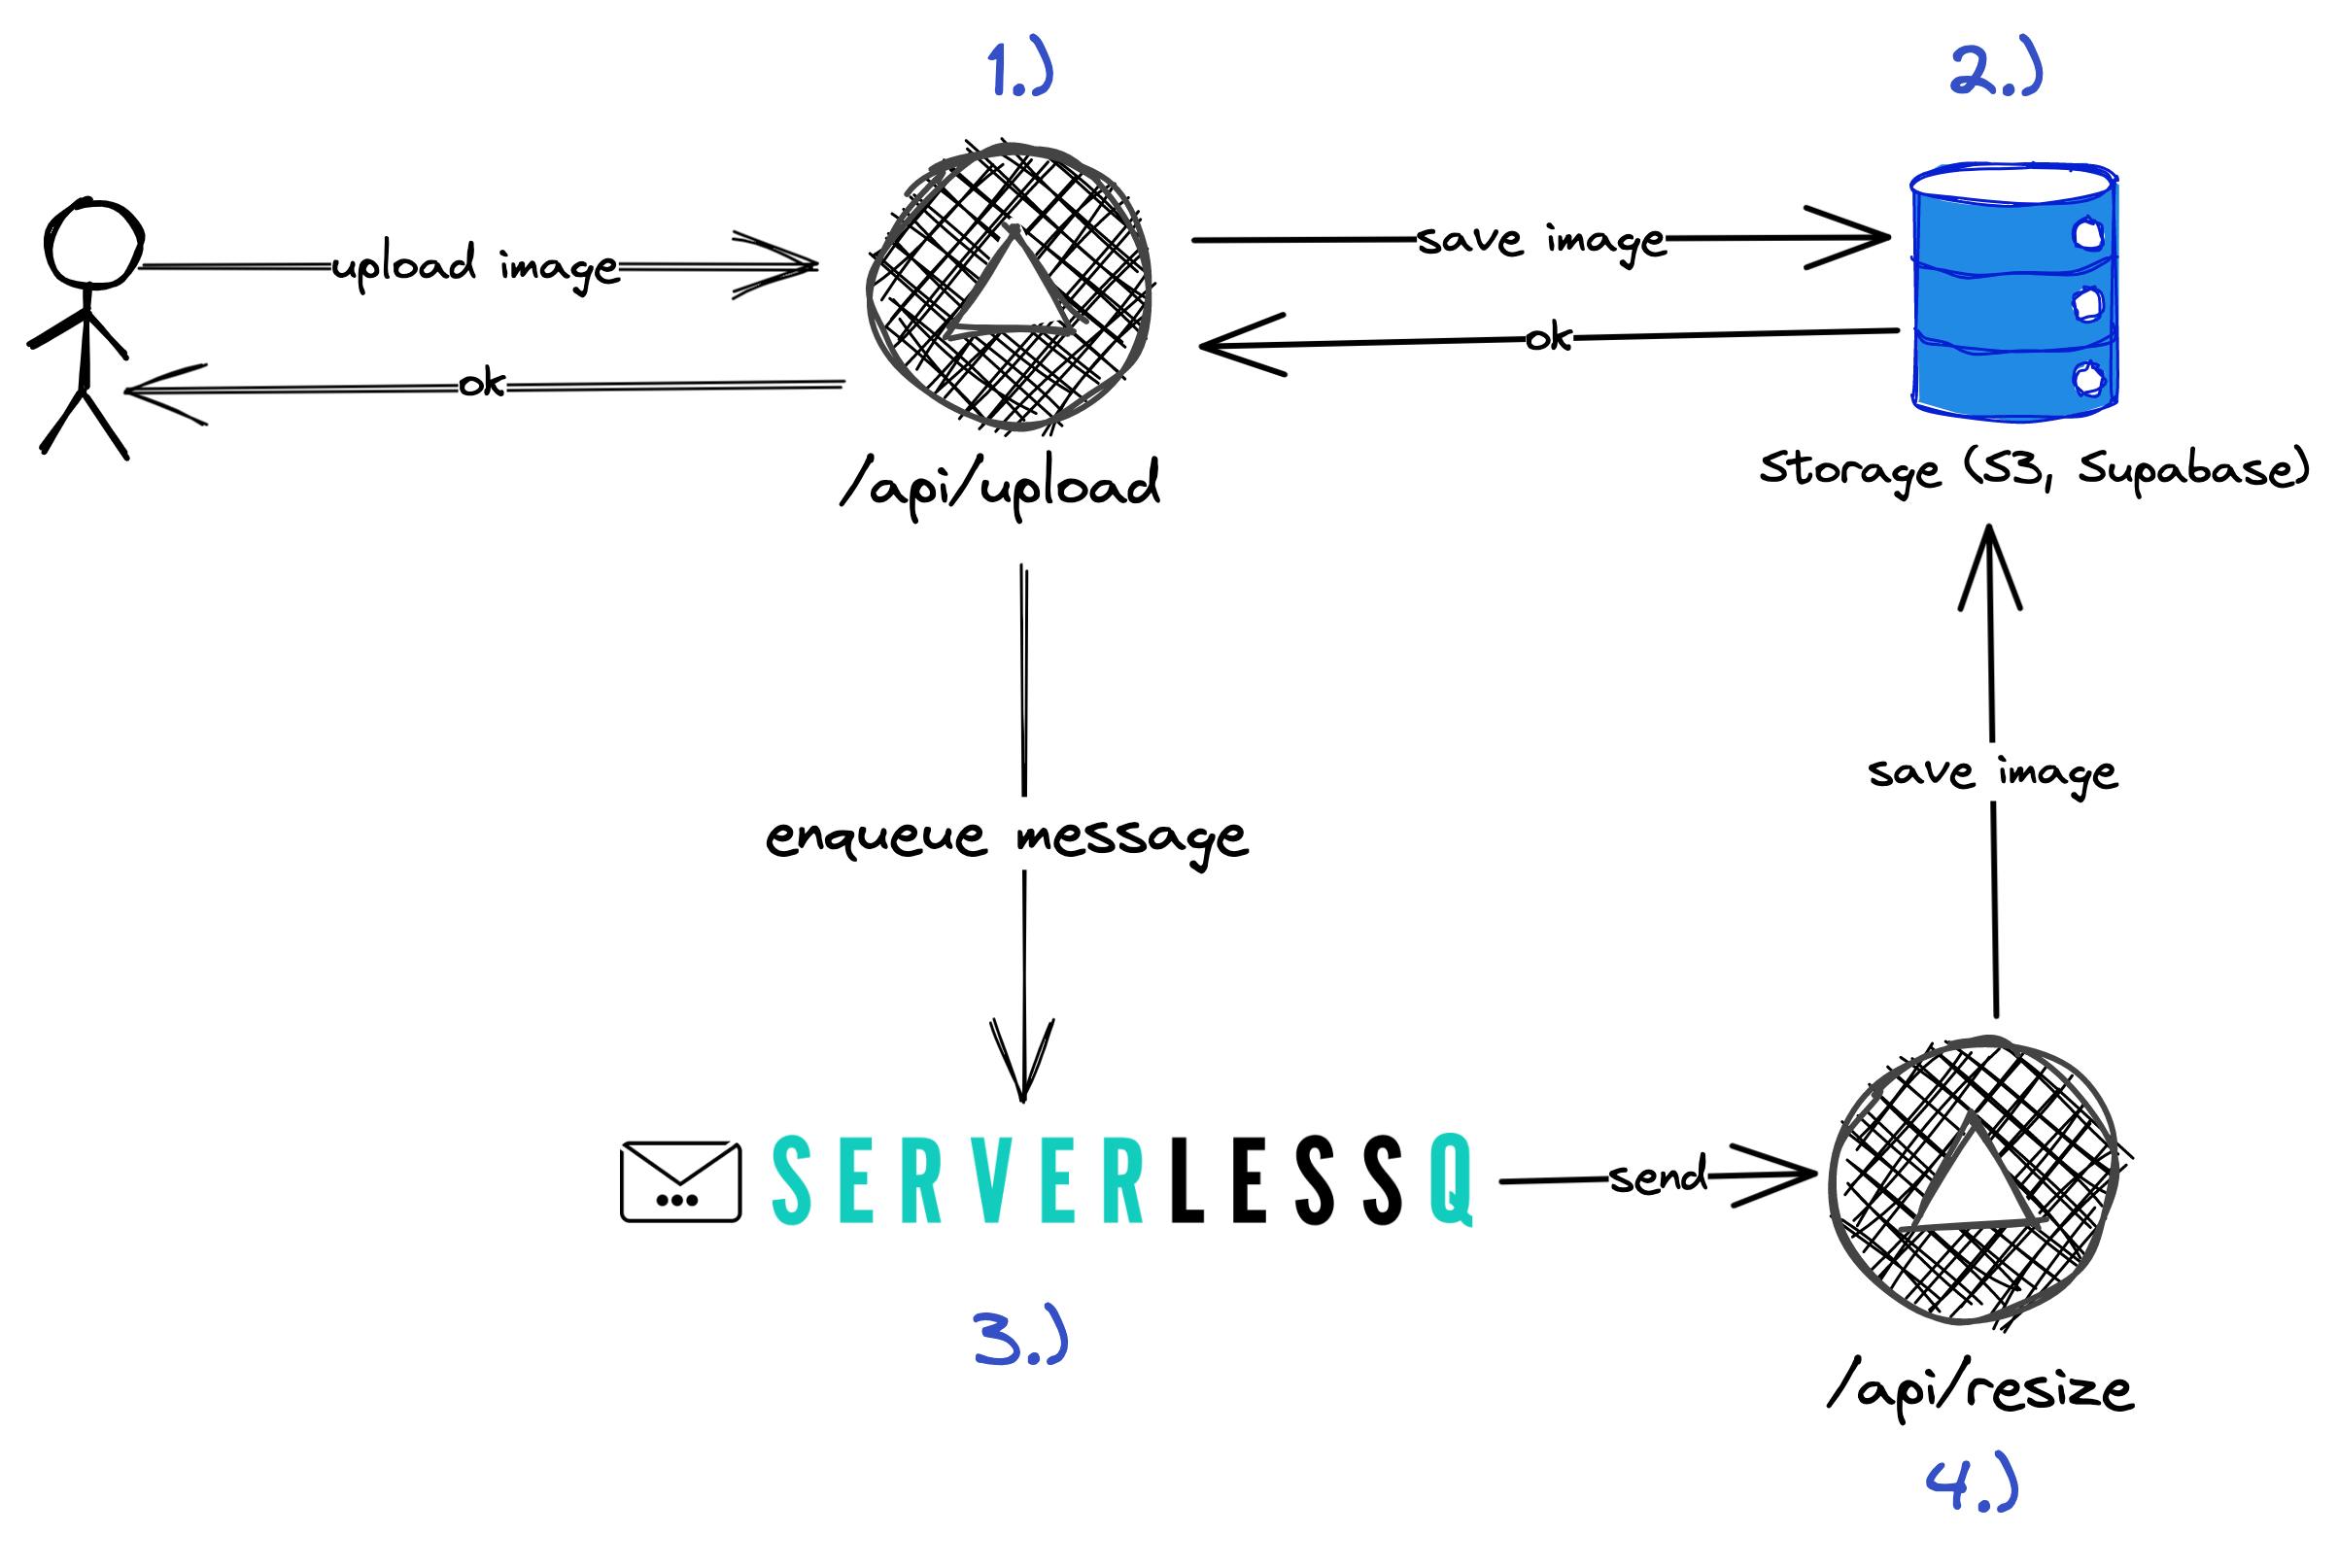
Three main things are happening in this function:
We parse the incoming `FormData` to get the file
Uploading the file to a storage provider
Enqueueing a job to ServerlessQ with the bucket and path as the body
Handling ServerlessQ
Setup ServerlessQ
First of all, you need to connect your Vercel project to ServerlessQ. You can do that easily using our Vercel Integration or adding the environment variable SERVERLESSQ_API_TOKEN. You can find more in our docs.
Create your Queue
As a next step, you need to create your Queue. You can create your queue directly from your Next.JS application without ever leaving your IDE 😉
The file pages/api/resize.ts shows an example creation of a queue.
export default Queue(
  "Image-Resize", // Name of the queue,
  "api/resize", // Path to this queue,
  async (req, res) => {
    // Business logic

    res.status(200).json({
      success: true,
      thumbnail: `thumbnails/${Key}`,
      avatar: `avatars/${Key}`,
      large: `large/${Key}`,
    });
  },
  { retries: 2, urlToOverrideWhenRunningLocalhost: "https://mock.codes/200" }
);
With our SDK, you can easily wrap your Next.JS API function and let us take care of the rest for you. You'll be exporting a Queue object, which requires you to define your business logic within it. Feel free to check out this file for an example.
Enqueuing Messages
To enqueue messages easily, you must import the Queue (remember to use await as the queue needs to be created!). The upload API code has already taken care of this step.
  await queue.enqueue({
    method: "POST",
    body: {
      Key: result.Key,
      Bucket: result.Bucket,
    },
  });
That's it! Your message flows now through ServerlessQ back to Vercel and you've built an asynchronous system. The message queue can handle thousands of messages per second and also handles retries.
Let's try it!
Let's see it in production
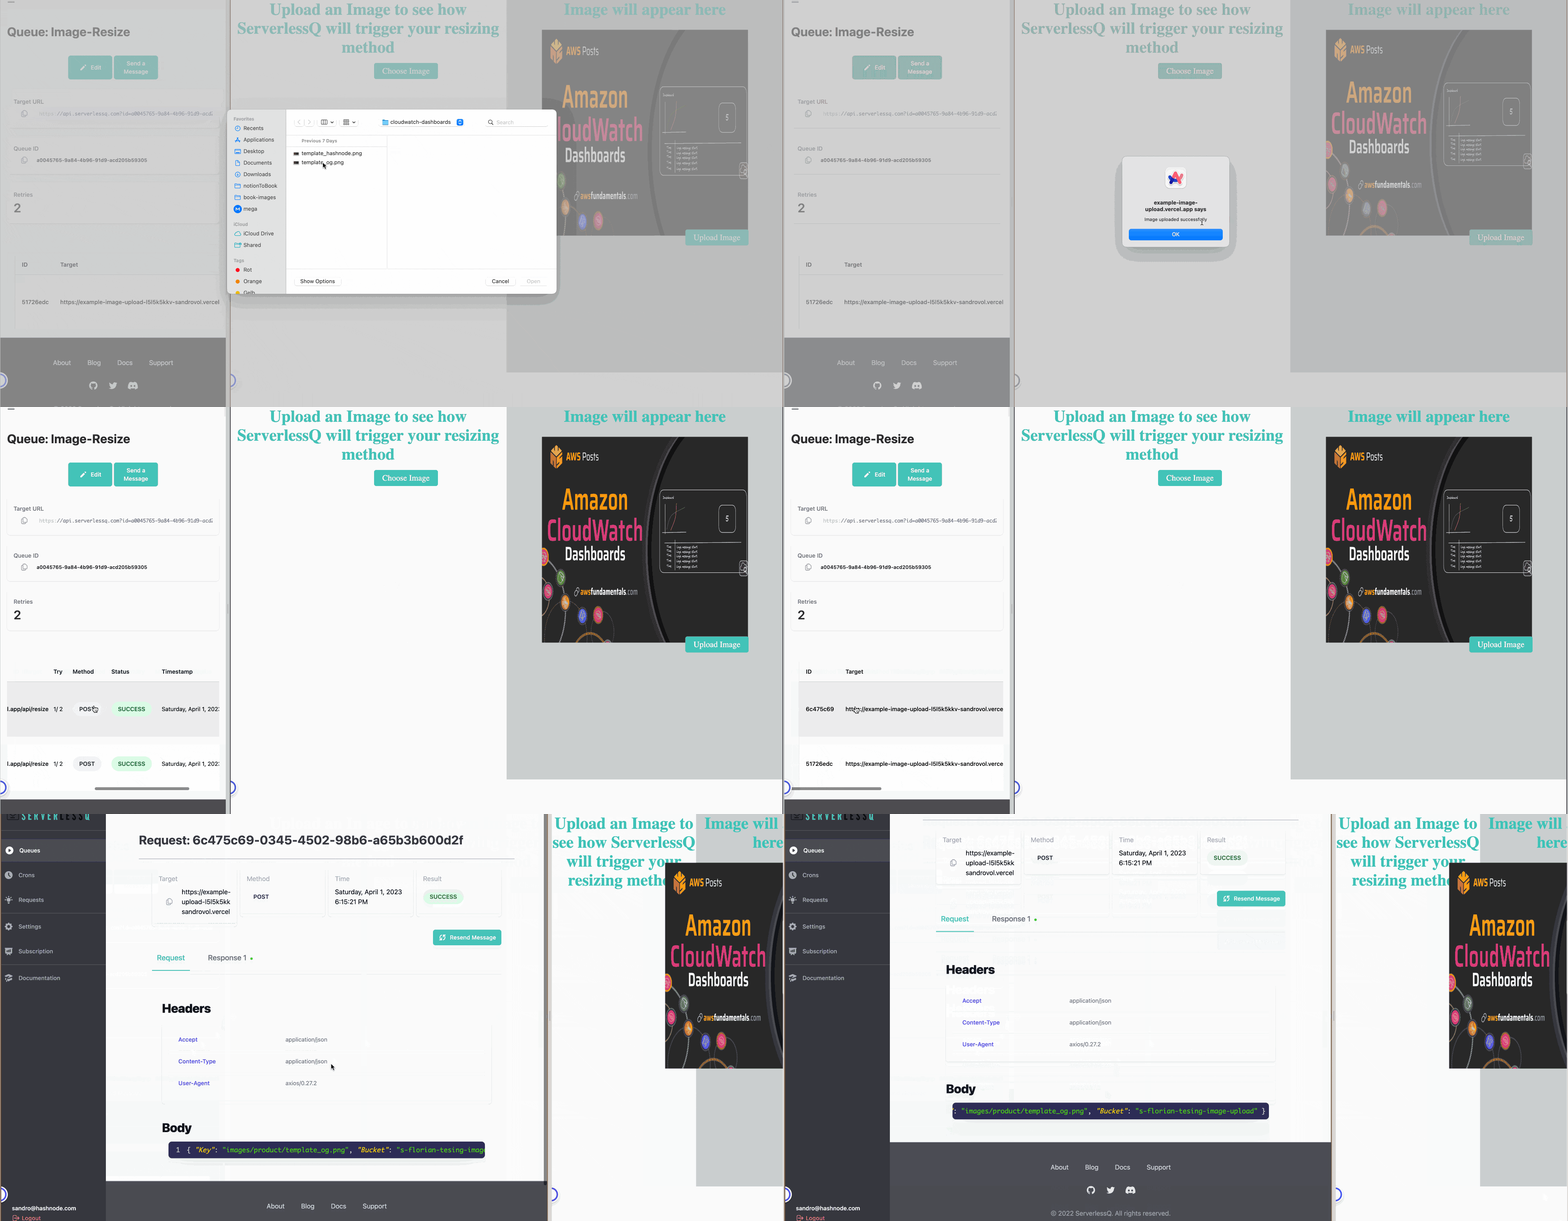
First, go to our deployed example application. We choose an image, upload it, and watch how the message will flow into ServerlessQ.

That means our message was now sent to our consumers, creating the image in different sizes. If we check our bucket, we see that it was successful:

Final Words
In this article, we have seen how easy it is with our new Vercel integration to create custom queue handlers. Let ServerlessQ take care of retries and the messaging and focus on writing code directly wrapped in queue handlers 🚀
Visit our documentation to get a more detailed overview of the new Vercel Integration and ServerlessQ.
You can also check out other articles on our blog.
We are more than happy to gather feedback through Twitter or Discord.
